Enhanced Graphs/Exportation of the graphs
Our team is currently working on additional/enhanced graphs that we can implement into the Budgeto app. Users have asked for the ability to print graphs, we are working on this in future updates! As a current workaround, users can screenshot their graphs and export them as either a PDF, JPEG, etc. Here is how to do it:

On Mac (Apple)
Source: Apple website
How to take a screenshot on your Mac
You can capture your entire screen or just a selected portion of it. The screenshot is automatically saved to your desktop.
How to take a screenshot of your entire screen
- Press Shift-Command (⌘)-3.
- Find the screenshot as a .png file on your desktop.
How to take a screenshot of a selected portion of your screen
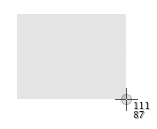
- Press Shift-Command-4. The pointer changes to a crosshair.
- Move the crosshair to where you want to start the screenshot, then drag to select an area.
While dragging, you can hold Shift, Option, or Space bar to change the way the selection moves.
- When you've selected the area you want, release your mouse or trackpad button. To cancel, press the Esc (Escape) key before you release the button.
- Find the screenshot as a .png file on your desktop.
On Windows (PC)
There are multiple ways of taking a screen shot or screen capture using Windows. Here are a few examples:
Print Screen
To capture your entire screen, click on the Print Screen button, sometimes shown as PrtSc on certain keyboards. You will then have to manually save your screenshot.
Windows key + Print Screen
This will automatically save your screen shot in your files/my captures. Tap the Print Screen (PrtSc) key and Windows key together
Snipping Tool

The snipping tool allows users to screen shot specific areas of your screen, rather than the whole screen all together.
- Click on your windows logo/sear bar and enter "snipping tool" in the search field.
- Once the snipping tool window is open, click on the button "New".

- Click and hold while dragging your cross hair (mouse) over the area you want to screenshot.
- Click on file, then on Save As... to name and save your screen shot.
Still need help? These resources are for you!
1- There is a search bar at the top right of the screen, use it often! Use words that you see on the section you are dealing with in order to search for related articles in our Knowledge Base.
2- If you haven't found an answer to your question, create a support ticket and our team will find an answer for you:
Click here to create a new ticket for help
3- If you have any other questions about Budgeto, write us an email at: support@budgeto.com
Happy Budgeting and know that we are here for you if you need help!
The Budgeto Team
Related Articles (please refer to the links below)

